
Account Opening Process
One can open a demat account through online. Here, we have provided a step-by-step process of how to open a demat account for online processes.
Step 1: Go to the Playstore then search Wealthy app and Install or Visit our website https://www.wealthy.in/ Under the header “Let’s grow your wealth, together” click on “Get started” and follow up the steps to complete the processes.


New Client Register
Step 2: Click on Wealthy App and New Client register-Click on Sign up.

Step 3: Enter your mobile number, First name, Last name (optional) and invite code (Optional) to Register.

Step 4: Click on Get OTP and it will get capture and select the Object and verify.

Login Screen
Step 5: It will get Login screen

Step 6: OTP will get normal message and WhatsApp number and enter the OTP.
Login PIN
Step 7: Enter the 4 digits PIN.

Step 8: It will get two options
- Enable finger print
- No, l’ll do this later.
Step 9: Click on Enable Fingerprint and Get Popup and verify Fingerprint.
Dashboard

Step 10: Click on No I’ll do this later and it will go to the Homepage.

Step 11: Click on Wealth.

1. Home
2. Watch List
3. Portfolio
4. Orders
5. Wealthy
KYC Process
Step 12: Display Start you KYC and Click on Begin KYC.
Step 13: Enter the mobile number and verify and Click on Continue.

Step 14: Enter the email id > verify and Click on Continue.

Personal Details
Step 15: Enter your Personal Details PAN, Date of Birth and Down it will get three check boxes and read check and uncheck box and Click on Continue.

DIGI Locker
Step 16: Next step is DIGILOCKER and Click on Next button.

Upload Proofs-PAN-IDCARD
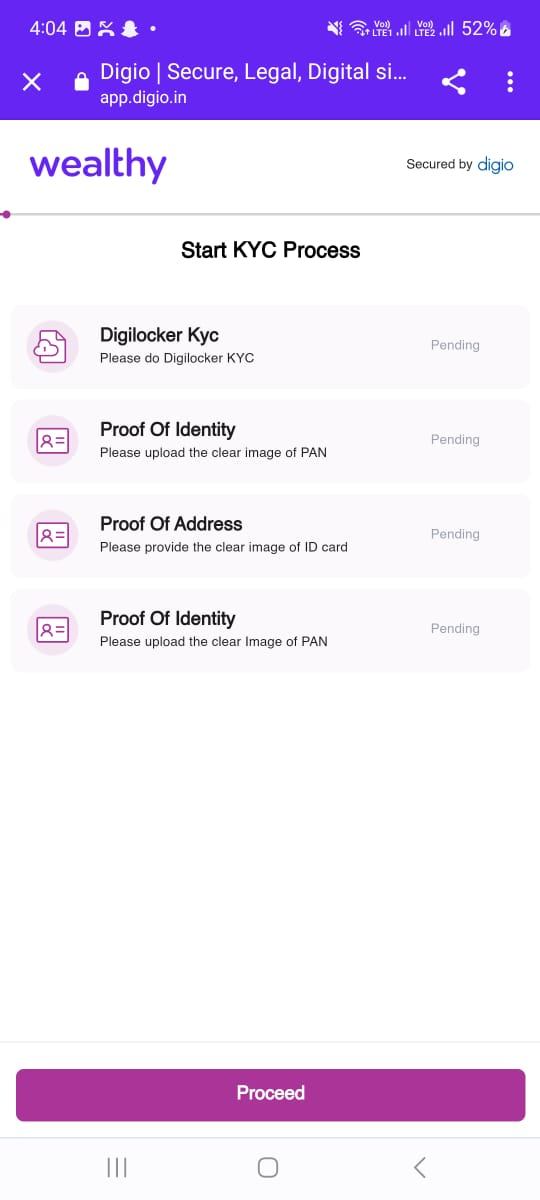
Step 17: Start KYC Process-We have to upload documents
- Proof Of Identity-Clear image of Pan
- Proof Of Address-Clear image of ID Card
- Proof Of Identity-Clear image of PAN
Click on Process
Step 18: It will display Aadhaar number, DOB, Name and Click on check box and Click on Authenticate Aadhaar.

Step 19: Enter the Aadhaar Number and Enter the Capture -Letters and Numbers and Click on Next button.

Step 20: OTP is generated and Enter the OTP, Click on Continue.

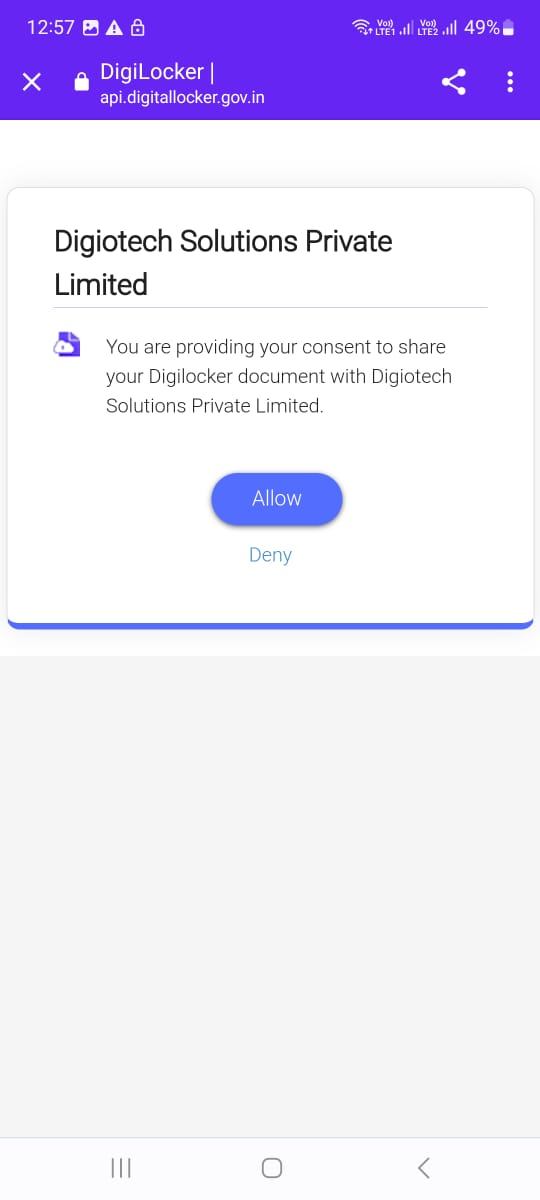
Step 21: Allow Digiotech Solutions private limited.
Step 22: DIGI KYC Process completed.

Other Mandatory Details
Enter the Father Name and Mother Name and Click on continue.

Step 23: Add Gender, occupations, Income.
Bank Details
Step 24: Enter the Account number and IFSC code and Click on confirm.

Nominee Details
Step 25: Enter the Nominee Detail -Full Name, DOB, PAN NO, Relation and enter the confirm.

E-Sign
Step 26: e-sign and Click on next.

Signature for KYC and Click on Submit.

E-Selfie
Step 27: Next step is IPV and Click on next.

Step 28: Selfie for KYC

Step 29: Click on terms conditions and two check boxes. Click on two check boxes and Click on proceed.

Step 30: Click on Account opening form and scroll down we can see all details for customer and Click on Sign now.

Step 31: Enter the Aadhaar number and Click on check box. Click on send OTP.

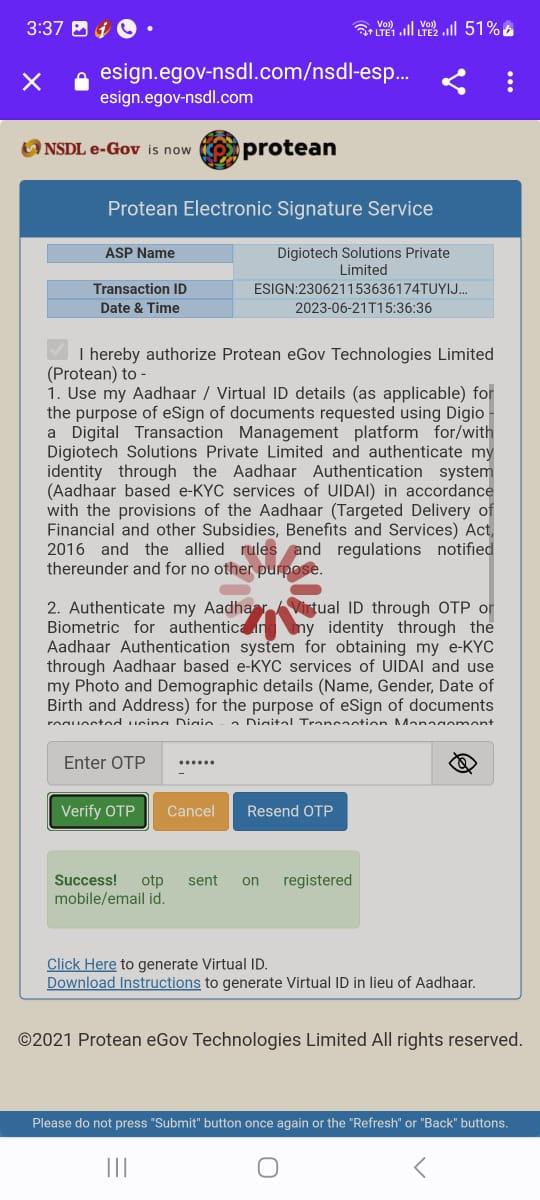
Step 32: Enter the OTP and Click on Verify.
Step 33: Document submitted successfully and Click on Activate F & O.

KYC PROCESS Completed
Step 34: Key process is completed and you will get message congratulations.

Once you have successfully completed the Account Opening process you can also track your application with status. It will take up to 2 working days to verify and activate your account.